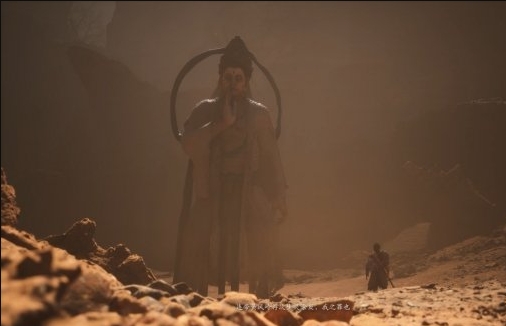
Walking behind the stone Buddha, there will be a road leading to a new area. Keep moving along the mountain path, and there will be some small monsters disturbing on the way. Then we will encounter the next Buddhist niche (Dingfeng Bridge).
There is a stone bridge ahead, and be careful of the little monsters holding shields on the bridge. Their defense and damage are not bad. After passing through, we will continue to advance towards the abandoned village inside. During this period, there are many zombies to be careful not to be ambushed by them. In front of the gate in the picture below, you will see three “Mouse Guards” standing at the entrance. This elite monster has a fast attack speed, and it is recommended that players focus on killing them one by one. Defeat the ‘Mouse Forbidden Guard’ and obtain its spirit.
Then we went to open the door where the three “rat guards” appeared. After leaving, there was an upgraded item called “Luojia Xiangteng” on the right. Don’t forget to collect it. Walking online, we encountered the next shrine (Dingfeng Village).
Continuing forward from Dingfeng Village, there were sporadic small monsters attacking along the way. As we advanced towards a bridge, we encountered the elite monster “Tiger Demon” standing at the bridgehead. In order to pass, we had to defeat him (note: Tiger Demon’s attack would shoot down the “Destiny Man” from the bridge and cause him to fall to his death). After defeating him, we obtained the important prop “Old Drumbeat”.
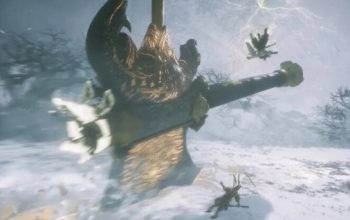
Moving forward into a cave, there are flying bats and other monsters inside, and you can also find a rare toy called the “Glass Relic Bottle”. After leaving the cave, you will immediately see the second demon king from the second chapter, “Stone Pioneer”.
After defeating the “Stone Pioneer”, we can obtain the prop “Stone Fierce”. At this point, we choose not to return to the stone Buddha mechanism at the “Wohu Temple” because there is a new path in the scene of the Stone Pioneer. We explore to the left and can open a new Buddhist niche “Stone Platform”.
PS: There is also a road on the right side of Stone Pioneer, leading to the new area of Soul Cliff, which is the location of some hidden bosses, including Xiaoli Long.
We will continue to explore inside and encounter a small monster called “Rat Sky” that contains spirit. It will use lightning to attack us, and after defeating it, there will be a cushion here to sit on.
On the right side of defeating ‘Mouse Sikong’, there is a small path where you can obtain the ‘Taiyi Purple Gold Pill’ (which can increase mana) from a treasure chest. As you move forward, you will encounter a yellow sand slope, jump over it and slide all the way, while avoiding attacks from distant monsters.
By sliding all the way, you can reach and open the new Buddhist niche “Zhenfengmen” (which is a branch road leading to the Guandi BOSS). There is a mechanism in front of the town gate that is similar to the one in Wohu Temple. It can be opened with the “Tiger’s Edge” and “Stone’s Fury”, and behind this door is the road to the boss at the bottom of the gate.
Of course, don’t worry now. There is a road on the left side of the Buddhist shrine, let’s continue moving forward. Along the way, you will encounter a new elite monster called ‘Hundred Eyes True Man’. There is also a collection item called ‘Luojia Xiangteng’ here.
The road leading to the boss at the bottom of the level has been collected.
Next, we will introduce another route, which is to teleport back to the “Wohu Temple” and return to the stone Buddha mechanism at the battle site with the Tiger Pioneer. Use the two key props obtained above to open the hidden path. At this point, a “tiger head” will rise in the blood pool, and the new route will be at the tiger’s mouth.
After entering the mouth of the tiger, you can find the “Blue Lotus Fairy Pill” inside and continue walking inside. There is a small door inside, and after entering, there are three raccoon monsters with hidden spirits. Defeat them and move forward all the way.
At this moment, we will once again encounter our old friend, the Headless Monk. His words imply that if we continue forward, we will encounter the boss of the level “Yellow Wind Saint”. Therefore, he taught us a new spell called “External Body Technique” (Monkey’s Clone Technique).
Open the Buddhist niche (cellar) here, and walking towards the right side, you will encounter NPC Xugou who helps us refine elixirs. His alchemy equipment has evolved, and at this time, he can help us refine the “Heavenly Elixir” that enhances our attributes.
After resting for a while, we walked down and found that it was a cross road. The left side was the edge of the Yellow Wind Formation, and the front gate was the town damper (branch road) mentioned earlier. At the end of the right side road, there was a cushion for us to sit on.
When we enter the Yellow Wind Formation, we will encounter the bottom boss of this round, “Yellow Wind Saint”. He is seen holding a Buddha head in his left hand and a three pronged steel fork in his right hand. In this Yellow Wind Ridge, he is stirring up waves of wind, and our task is to eradicate this scourge.

As the Yellow Wind Great Sage was defeated by our Heavenly Mandate, the Headless Monk reappeared to clarify the storyline of this chapter. It turned out that the Yellow Wind Monster had taken the Great Sage’s root tool and deceived the Master Miezu by cutting off the head of Lingji Bodhisattva, using the head level as a container to hold the Great Sage’s root tool.
The headless monk lifted his head, and his identity was now clear. It turned out that he was the owner of the rat demon – Lingji Bodhisattva. In the end, he thanked us, the heavenly beings, and gave us the root tool of the Great Sage – Ear Listening Anger. The second round ends.


